root
root123
5/09/2013
4/24/2013
CTCP - Compound TCP
簡介:
CTCP 是 Microsoft 所研發的一種TCP algorithm, 原始是被用在Windows Vista (非預設) and Windows Server 2008 上的TCP Stack. 他主要是被設計成可以積極的調整送端的壅塞窗戶, 並且其主要針對頻寬大而延遲高的網路通道作最佳化, 而又不失TCP 之公平性. CTCP可以用hotfix 套用於Linux 與 Windows XP.
原則:
CTCP 使用queueing 延遲來作為壅塞的衡量參數. 如果queueing延遲很小, 那他就會假設目前網路通道上沒有link發生壅塞, 進而快速增加傳送速率.
CTCP 維護兩種壅塞窗戶, 一種是一般的AIMD窗戶, 另一種是以延遲為基準的窗戶, 而實際上的Sliding window size 就是以上兩種的總和. AIMD窗戶大小增加的行為與TCP Reno相同.
如果網路環境的延遲很小, 那麼延遲窗戶就會快速加大, 一旦發現queueing發生, 延遲窗戶就會快速減小, 來補償AIMD窗戶增加的量. 主要目的是要讓 AIMD 窗戶 size + 延遲窗戶 size ~= 定值 (趨近定值) 而當queue 發生時, 延遲窗戶所減少的量會接近於queue size, 以防止持續性的壅塞. 所以CTCP的特點在於, 他可以根據delay的程度來調整其窗戶 size.
設定:
在Windows 7 如果想要啟用的話, 可使用以下指令:
netsh interface tcp set global congestionprovider=ctcp
在Windows 8 的話, 可使用以下指令:
set-nettcpsetting -Settingname Custom -CongestionProvider CTCP
顯示目前您電腦的TCP設定:
netsh interface tcp show global
1/19/2013
測試DNS是否成功設定 - python script
#!/usr/bin/python
import time
import sys
import os
i = 1
if len(sys.argv) < 3:
sys.stderr.write('Usage: sys.argv[0] target-domain times-of-test DNS-IP\n')
sys.exit(1)
else:
counter = int(sys.argv[2])
domain = sys.argv[1]
dnsip = sys.argv[3]
while i <= counter:
i += 1
os.system("dig " + domain "@" + dnsip + " | grep NXDOMAIN")
#只要看ouput出來有幾行 NXDOMAIN 就知道大約的錯誤機率了
1/15/2013
保護眼睛 螢幕設定模式
作為一個資訊相關的工程師, 或是一般上網的重度使用者, 一定會覺得常常眼壓很高很累吧. 個人最近甚至因為常常工作看螢幕, 飛蚊症漸漸出現, 為了讓各位的眼睛能夠用久一點, 在此推薦在 win 7 裡面可以設定螢幕色調相反模式, 也就是如果網頁是白底黑字, 就會變成黑底白字, 眼睛長期看螢幕比較不會一直都在看白色部份.
設定方法如下:
控制台 -> 輕鬆存取中心 -> 啟動放大鏡 -> 在放大鏡控制介面有個齒輪設定圖案
-> 進入設定後 勾選 開啟色彩反轉
大功告成
以後覺得眼睛很酸很累又需要看螢幕時, 可以嘗試開啟此模式喔
看網頁會像是下面這樣:

設定方法如下:
控制台 -> 輕鬆存取中心 -> 啟動放大鏡 -> 在放大鏡控制介面有個齒輪設定圖案
-> 進入設定後 勾選 開啟色彩反轉
大功告成
以後覺得眼睛很酸很累又需要看螢幕時, 可以嘗試開啟此模式喔
看網頁會像是下面這樣:

1/01/2013
在linux刪除所有特定的程序
linux上面有些daemon一次可能會開多個process, 例如: nginx, 如果我們想要一次kill所有跟nginx相關的process, 可以使用 killall nginx 來刪除所有與nginx有關的 running process.
12/16/2012
網路設備測試工作常用工具指令 on Windows
以下工具是網管或網路測試人員常會用到的工具, 在此列出指令方便往後快速開啟:
按下執行後輸入:
cmd, 命令提示字元
nslookup, 查詢domain name的IP
ipconfig /flushdns 清除暫存在本機的DNS紀錄
節省你在那裡用控制台介面慢慢設定IP, netmask, dns的時間
{
netsh dump > C:\ipconfig.txt, 倒出目前PC網路設定檔
netsh < C:\ipconfig.txt, 改完設定後再倒回去
netsh dump | find "8.8.8.8" > C:\ipconfig.txt, 如果想要濾出要改的部份可用find
}
關閉防火牆
{
netsh firewall set opmode
mode=disable profile=corporate
}
開啟防火牆
{
netsh firewall set opmode
mode=enable profile=other
}
calc, 算頻寬或是網段使用
snipping, Screenshot擷圖證明使用
mspaint, 小畫家當作備用的Screenshot
powerpoint, 作測試報告用
11/19/2012
11/08/2012
6/08/2012
how to change the multiple file extensions at once
example:
sh-3.2# find ./ -type f -exec mv {} {}.pcap \;
5/25/2012
快速設定網路 on windows - use netsh command
最近常常需要在不同電腦上設定不同的網路, 每次都要開控制台又要進到網路連線設定按一堆鍵, 久了實在是覺得很沒有效率, 為了改善此一現狀, 可以使用netsh 這個windows內建的指令來做設定.
1. 首先使用管理者權限開啟CMD
2. 輸入下列指令設定本機IP與DNS server:
[以下只是範例 exmaple]
netsh interface ip set address "區域連線" static 192.168.0.1 255.255.255.0 192.168.0.254 1
netsh interface ip set dns "區域連線" static 8.8.8.8
3. 完成
1. 首先使用管理者權限開啟CMD
2. 輸入下列指令設定本機IP與DNS server:
[以下只是範例 exmaple]
netsh interface ip set address "區域連線" static 192.168.0.1 255.255.255.0 192.168.0.254 1
netsh interface ip set dns "區域連線" static 8.8.8.8
3. 完成
5/16/2012
Show iptable rules with interface info
#iptables -L -v
and see the "in" "out" column
If you only want to see the iptable rules with certain interface,
use some thing like iptables -L -v | grep eht0.
and see the "in" "out" column
If you only want to see the iptable rules with certain interface,
use some thing like iptables -L -v | grep eht0.
5/11/2012
replace localhost CNAME : Proxy debugging tool [CNAME]
http://www.charlesproxy.com/download/latest-release/download.do
5/08/2012
筆電當AP , turn your windows 7 laptop into a Wi-Fi Hotspot
1. 進入命令提示字元 (用管理者權限開啟) - enter cmd
>netsh wlan set hostednetwork mode=allow ssid=NAME key=PASSWORD
2.
>netsh wlan start hostednetwork
3. 進入控制台中的網路介面設定, 在剛剛新增的連線 -> 右鍵 -> 內容 -> 共用
勾選 允許其他網路使用者透過這台電腦的網際網路連線來連線
不勾選 允許其他網路使用者來控制或停用網際網路連線共用
完成 :D
>netsh wlan set hostednetwork mode=allow ssid=NAME key=PASSWORD
2.
>netsh wlan start hostednetwork
3. 進入控制台中的網路介面設定, 在剛剛新增的連線 -> 右鍵 -> 內容 -> 共用
勾選 允許其他網路使用者透過這台電腦的網際網路連線來連線
不勾選 允許其他網路使用者來控制或停用網際網路連線共用
完成 :D
5/07/2012
HLS (for iphone, ipad streaming service) server 架設
1. Download AVC streamer :
http://www.geardownload.com/d.php?id=69428&url=http://files.geardownload.com/3a54e-ff8ed/dl012/avcstreamer_win32_v0.02-alpha.zip
2. unzip
3. modify /etc/avcserver.conf
{
# listen=[local HTTP server ip address]:[port]
# listen=127.0.0.1:8080
listen=127.0.0.1:8080
#modify to your own server IP or domain name
# media=[ media library dir ]
# This is the root directory of all your stored video files
# media=
media=/videos
#modify to the directory you want to put video files in
# home=[ AVCstreamer home dir ]
# Default value is automatically discovered based on invocation path
# home=
home=../
#root path
}
4. run
5/03/2012
清空DNS快取 [windows]
> ipconfig /flushdns
這個指令目前個人是常用於 更新某個domain name 所要對應到的IP
example: 我已經在 hosts file 裡面設定 www.yahoo.com.tw 對應到的IP 是我自己架設server之IP, 這時候由於之前我已經問過DNS server about the www.yahoo.com.tw 的 IP, 所以要先清空這筆DNS快取內的old record.
win7 下 hosts file path : C:\Windows\System32\drivers\etc\hosts
這個指令目前個人是常用於 更新某個domain name 所要對應到的IP
example: 我已經在 hosts file 裡面設定 www.yahoo.com.tw 對應到的IP 是我自己架設server之IP, 這時候由於之前我已經問過DNS server about the www.yahoo.com.tw 的 IP, 所以要先清空這筆DNS快取內的old record.
win7 下 hosts file path : C:\Windows\System32\drivers\etc\hosts
1/25/2012
VIM設定檔 [sharing]
Write the following in the .vimrc :
set cindent
set enc=taiwan
set encoding=utf-8
set hls
set nocompatible
set sw=2
highlight Comment ctermfg=darkcyan
highlight Search term=reverse ctermbg=4 ctermfg=7
set autoindent
set ai
set cin
set ru
set showcmd
set bs=2
set ts=4
syntax on
set background=dark
set t_Co=256
set number
filetype plugin on
screen 設定檔 [sharing]
Share for everyone:
write the following in the .screenrc
termcapinfo xterm 'hs:ts=\E]2;:fs=\007:ds=\E]2;screen\007'
termcapinfo xterm 'hs:ts=\E]0;:fs=\007:ds=\E]0;bash\007'
caption always "%{= wk} %{= KY} [%n]%t @ %H %{-} %= %{= KR} %l %{-} | %{= KG} %Y-%m-%d %{-} "
hardstatus " %-Lw%{= Bw}louwang%n%f %t%{-}%+Lw %=| %0c:%s "
shelltitle '$ |bash'
defhstatus "\005t"
1/18/2012
關閉 ubuntu 預設的自動鎖螢幕
System -> Preferences -> Screensaver
to open the Screensaver Preferences" dialog box.
Uncheck "Lock screen when screensaver is active" at the bottom of the dialog box.
1/08/2012
12/18/2011
Change the LED in mouse
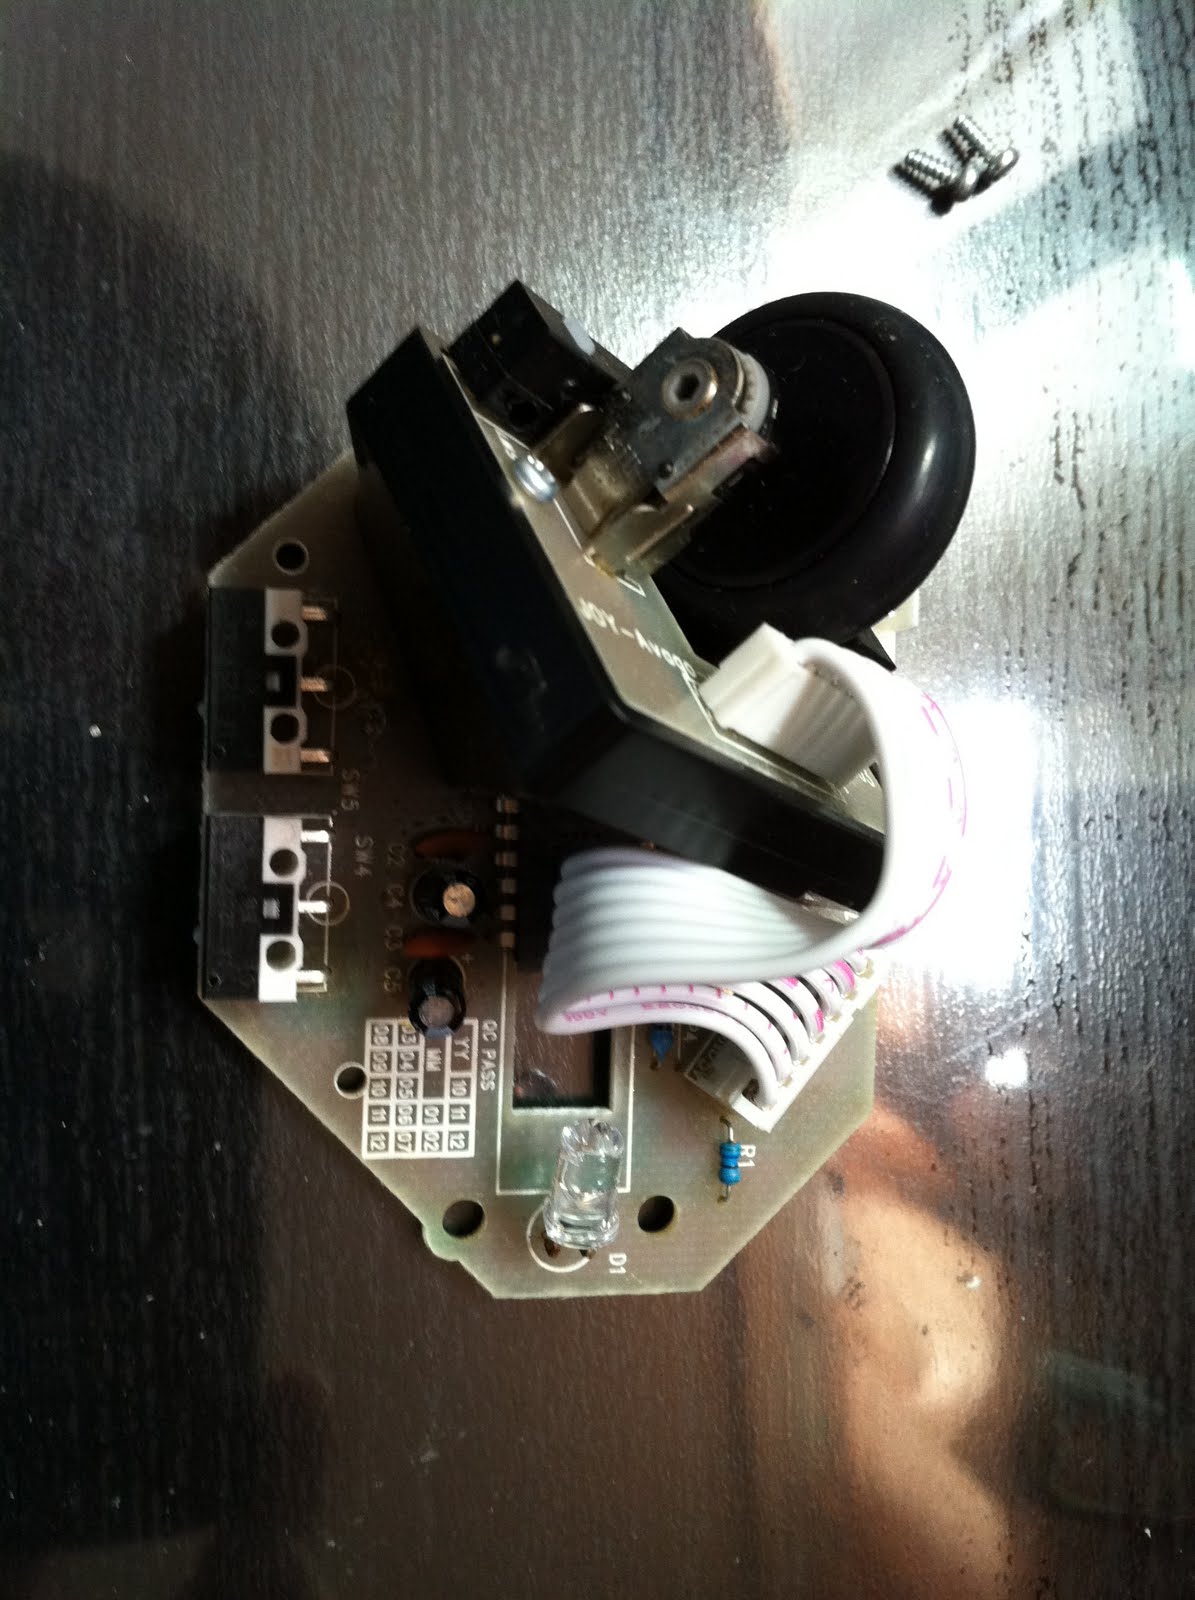 |
| 滑鼠拆開後的主體 |
 |
| 開始解焊原本滑鼠的紅色LED |
 |
| 準備要換上的超級藍光LED |
 |
| YES! 安裝完成 酷炫藍光射出 |
 |
| 好像比原本紅光來的亮 |
 |
| 裝上外殼後 |
 |
| 工作站一覽 |
訂閱:
文章 (Atom)