#iptables -L -v
and see the "in" "out" column
If you only want to see the iptable rules with certain interface,
use some thing like iptables -L -v | grep eht0.
5/16/2012

5/11/2012
replace localhost CNAME : Proxy debugging tool [CNAME]
http://www.charlesproxy.com/download/latest-release/download.do
5/08/2012
筆電當AP , turn your windows 7 laptop into a Wi-Fi Hotspot
1. 進入命令提示字元 (用管理者權限開啟) - enter cmd
>netsh wlan set hostednetwork mode=allow ssid=NAME key=PASSWORD
2.
>netsh wlan start hostednetwork
3. 進入控制台中的網路介面設定, 在剛剛新增的連線 -> 右鍵 -> 內容 -> 共用
勾選 允許其他網路使用者透過這台電腦的網際網路連線來連線
不勾選 允許其他網路使用者來控制或停用網際網路連線共用
完成 :D
>netsh wlan set hostednetwork mode=allow ssid=NAME key=PASSWORD
2.
>netsh wlan start hostednetwork
3. 進入控制台中的網路介面設定, 在剛剛新增的連線 -> 右鍵 -> 內容 -> 共用
勾選 允許其他網路使用者透過這台電腦的網際網路連線來連線
不勾選 允許其他網路使用者來控制或停用網際網路連線共用
完成 :D
5/07/2012
HLS (for iphone, ipad streaming service) server 架設
1. Download AVC streamer :
http://www.geardownload.com/d.php?id=69428&url=http://files.geardownload.com/3a54e-ff8ed/dl012/avcstreamer_win32_v0.02-alpha.zip
2. unzip
3. modify /etc/avcserver.conf
{
# listen=[local HTTP server ip address]:[port]
# listen=127.0.0.1:8080
listen=127.0.0.1:8080
#modify to your own server IP or domain name
# media=[ media library dir ]
# This is the root directory of all your stored video files
# media=
media=/videos
#modify to the directory you want to put video files in
# home=[ AVCstreamer home dir ]
# Default value is automatically discovered based on invocation path
# home=
home=../
#root path
}
4. run
http://www.geardownload.com/d.php?id=69428&url=http://files.geardownload.com/3a54e-ff8ed/dl012/avcstreamer_win32_v0.02-alpha.zip
2. unzip
3. modify /etc/avcserver.conf
{
# listen=[local HTTP server ip address]:[port]
# listen=127.0.0.1:8080
listen=127.0.0.1:8080
#modify to your own server IP or domain name
# media=[ media library dir ]
# This is the root directory of all your stored video files
# media=
media=/videos
#modify to the directory you want to put video files in
# home=[ AVCstreamer home dir ]
# Default value is automatically discovered based on invocation path
# home=
home=../
#root path
}
4. run
5/03/2012
清空DNS快取 [windows]
> ipconfig /flushdns
這個指令目前個人是常用於 更新某個domain name 所要對應到的IP
example: 我已經在 hosts file 裡面設定 www.yahoo.com.tw 對應到的IP 是我自己架設server之IP, 這時候由於之前我已經問過DNS server about the www.yahoo.com.tw 的 IP, 所以要先清空這筆DNS快取內的old record.
win7 下 hosts file path : C:\Windows\System32\drivers\etc\hosts
這個指令目前個人是常用於 更新某個domain name 所要對應到的IP
example: 我已經在 hosts file 裡面設定 www.yahoo.com.tw 對應到的IP 是我自己架設server之IP, 這時候由於之前我已經問過DNS server about the www.yahoo.com.tw 的 IP, 所以要先清空這筆DNS快取內的old record.
win7 下 hosts file path : C:\Windows\System32\drivers\etc\hosts
1/25/2012
VIM設定檔 [sharing]
Write the following in the .vimrc :
set cindent
set enc=taiwan
set encoding=utf-8
set hls
set nocompatible
set sw=2
highlight Comment ctermfg=darkcyan
highlight Search term=reverse ctermbg=4 ctermfg=7
set autoindent
set ai
set cin
set ru
set showcmd
set bs=2
set ts=4
syntax on
set background=dark
set t_Co=256
set number
filetype plugin on
set cindent
set enc=taiwan
set encoding=utf-8
set hls
set nocompatible
set sw=2
highlight Comment ctermfg=darkcyan
highlight Search term=reverse ctermbg=4 ctermfg=7
set autoindent
set ai
set cin
set ru
set showcmd
set bs=2
set ts=4
syntax on
set background=dark
set t_Co=256
set number
filetype plugin on
screen 設定檔 [sharing]
Share for everyone:
write the following in the .screenrc
termcapinfo xterm 'hs:ts=\E]2;:fs=\007:ds=\E]2;screen\007'
termcapinfo xterm 'hs:ts=\E]0;:fs=\007:ds=\E]0;bash\007'
caption always "%{= wk} %{= KY} [%n]%t @ %H %{-} %= %{= KR} %l %{-} | %{= KG} %Y-%m-%d %{-} "
hardstatus " %-Lw%{= Bw}louwang%n%f %t%{-}%+Lw %=| %0c:%s "
shelltitle '$ |bash'
defhstatus "\005t"
write the following in the .screenrc
termcapinfo xterm 'hs:ts=\E]2;:fs=\007:ds=\E]2;screen\007'
termcapinfo xterm 'hs:ts=\E]0;:fs=\007:ds=\E]0;bash\007'
caption always "%{= wk} %{= KY} [%n]%t @ %H %{-} %= %{= KR} %l %{-} | %{= KG} %Y-%m-%d %{-} "
hardstatus " %-Lw%{= Bw}louwang%n%f %t%{-}%+Lw %=| %0c:%s "
shelltitle '$ |bash'
defhstatus "\005t"
1/18/2012
關閉 ubuntu 預設的自動鎖螢幕
System -> Preferences -> Screensaver
to open the Screensaver Preferences" dialog box.
Uncheck "Lock screen when screensaver is active" at the bottom of the dialog box.
1/08/2012
12/18/2011
Change the LED in mouse
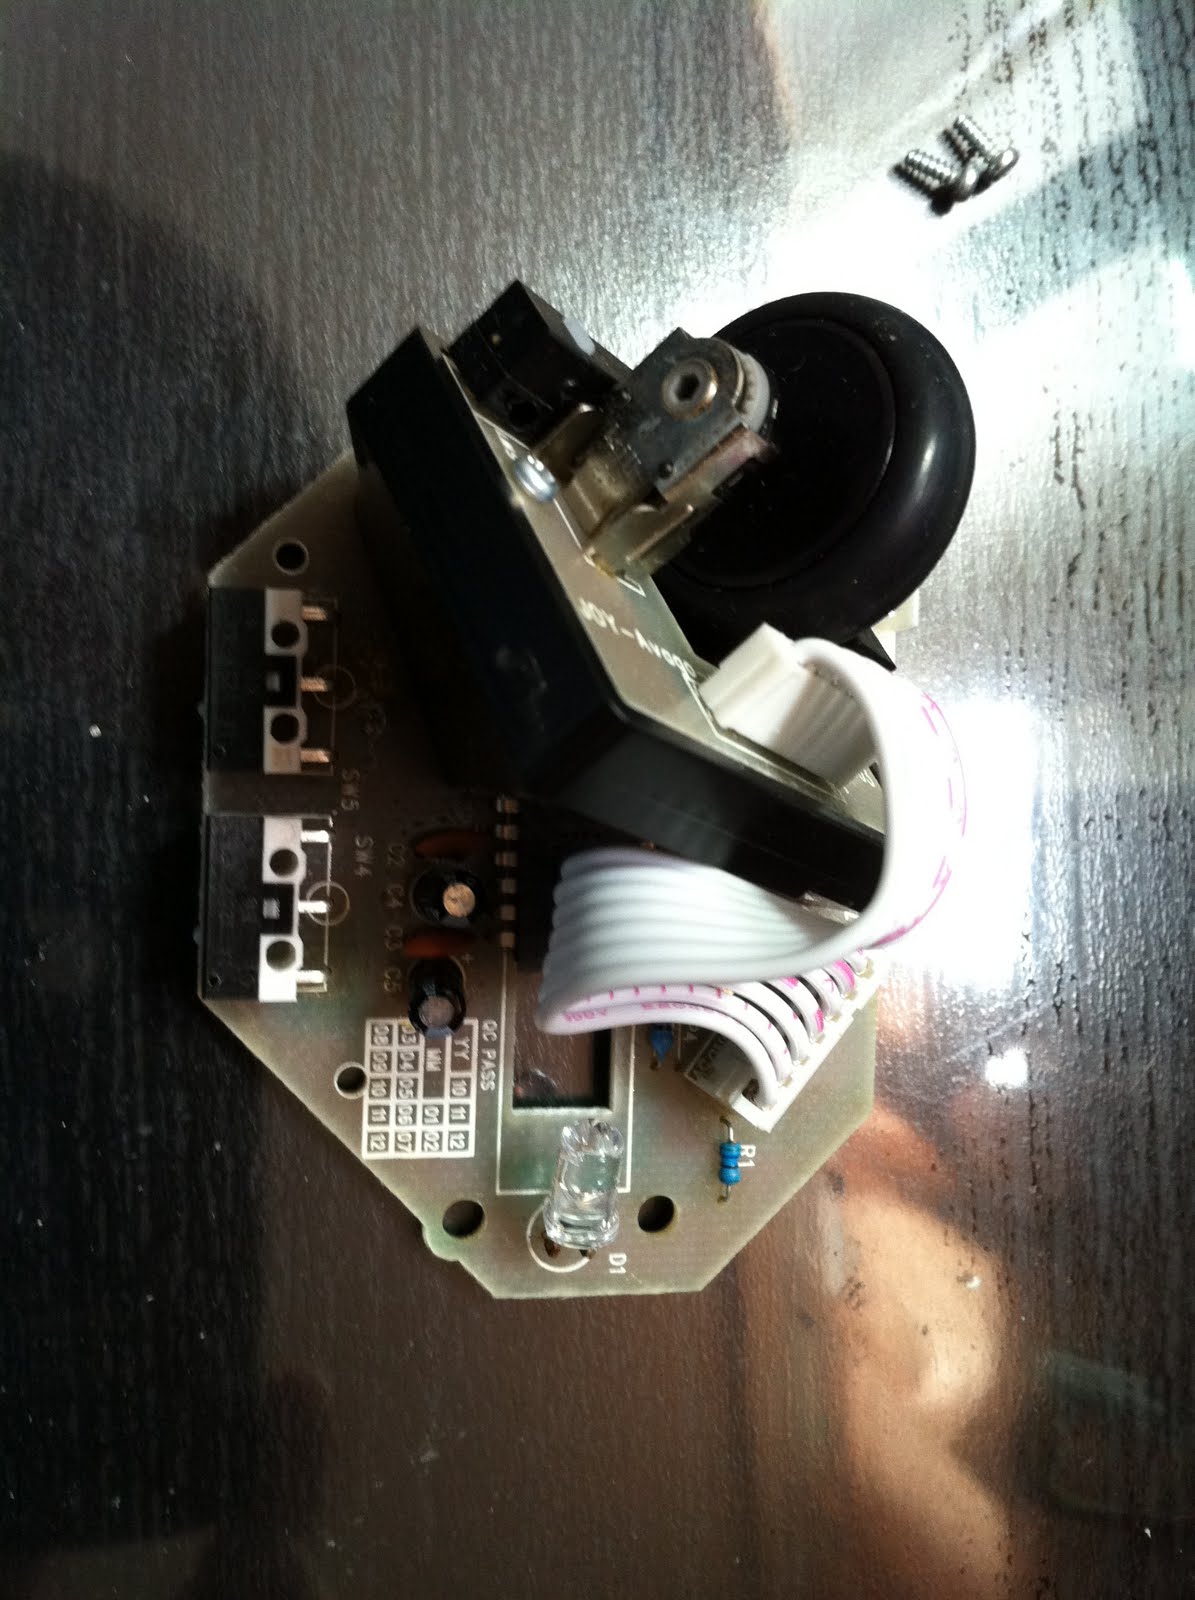 |
| 滑鼠拆開後的主體 |
 |
| 開始解焊原本滑鼠的紅色LED |
 |
| 準備要換上的超級藍光LED |
 |
| YES! 安裝完成 酷炫藍光射出 |
 |
| 好像比原本紅光來的亮 |
 |
| 裝上外殼後 |
 |
| 工作站一覽 |
4/30/2011
Install GlassFish on Linux
o. sudo apt-get update
o. sudo apt-get install sun-java6-jdk sun-java6-jre
o. add export JAVA_HOME="/usr/lib/jvm/java-6-sun-1.6.0.06" to ~/.bashrc
o. download glassfish for linux from glassfish official website
o. sh glassfish-3.0.1-unix.sh
o. cd ~/glassfishv3/glassfish/bin
o. ./startserv #start glassfish
o. sudo apt-get install sun-java6-jdk sun-java6-jre
o. add export JAVA_HOME="/usr/lib/jvm/java-6-sun-1.6.0.06" to ~/.bashrc
o. download glassfish for linux from glassfish official website
o. sh glassfish-3.0.1-unix.sh
o. cd ~/glassfishv3/glassfish/bin
o. ./startserv #start glassfish
4/05/2011
大量取代檔案中的關鍵字
這裡我所用到的case是我在許多網頁檔案中都有我blog的連結, 但是現在我domain name改了, 所以如果要一個一個檔案開檔然後修改就很麻煩, 這裡記錄快速方法:
grep 'keyword' * | sed 's/original_domain/new_domain/g'
keyword: 你想要找的關鍵字
original_domain: 要被取代的字串 (ex: IP address, domain name, parameter)
new_domain: 要填上的字串
如果要直接修改檔案的話請用 sed -i 's/A/B/g' file.txt.
grep 'keyword' * | sed 's/original_domain/new_domain/g'
keyword: 你想要找的關鍵字
original_domain: 要被取代的字串 (ex: IP address, domain name, parameter)
new_domain: 要填上的字串
如果要直接修改檔案的話請用 sed -i 's/A/B/g' file.txt.
3/30/2011
在Linux下大量改變副檔名
雖然在linux之下副檔名並沒有什麼意義, 但是有時候為了辨識容易還是會用到.這裡提供一下在bash/C shell下如何大量改變副檔名
Bourne Shell:
for f in *.foo; do
base=`basename $f .foo`
mv $f $base.bar
done
C Shell:
foreach f ( *.foo )
mv $f $f:r.bar
end
Bourne Shell:
for f in *.foo; do
base=`basename $f .foo`
mv $f $base.bar
done
C Shell:
foreach f ( *.foo )
mv $f $f:r.bar
end
10/15/2010
5/05/2010
vi 編輯完檔案 發現忘記按sudo編輯 之 解決方法
:w !sudo tee %
有時候沒有注意編輯檔案的權限, 等到全部編輯完才發現忘記打sudo,
我可不想跳出去再重新編輯一次, 這時候在vi 指令模式下用以上指令即可儲存.
有時候沒有注意編輯檔案的權限, 等到全部編輯完才發現忘記打sudo,
我可不想跳出去再重新編輯一次, 這時候在vi 指令模式下用以上指令即可儲存.
5/04/2010
在eeebox b202, FreeBSD 8.0 release 安裝 wireless card driver
This is the process to setup eeebox's wireless driver on FreeBSD:
The eeebox's wireless chip is rt2860 made by the company - ralink.
method 1(WARNING: this method is NOT success in my trial):
convert windows driver for rt2860 to FreeBSD kernel module.
download windows version driver: rt2860.inf, rt2860.sys
put kernel module generated from ndisgen which is rt2860_sys.ko to /boot/modules
edit /boot/loader.conf add rt2860_sys_load="YES"
result -> fail -> the strange error message keep output to screen
"ndis0 if_input should not be called"
accidently find there are already a driver for rt2860 for FreeBSD 7.0 and 8.0 release
so I abandon method 1 and turn to method 2.
method 2 (SUCCESS): find the kernel module.
Surprisely, someone has write the rt2860/rt2870 driver for FreeBSD.
http://repo.or.cz/w/ralink_drivers/rt2860_fbsd8.git
use git clone links to download whole source code
make
cp rt2860.ko/ rt2860.ko.module to /boot/kernel
set rt2860_load="YES" in /boot/loader.conf
reboot system.
Loading rt2860.ko/rt2870.ko will create the hardware interface rt28600/rt28700 respectively but since version 8 of FreeBSD, these are not controlled directly for the usual settings but with a virtual interface that must created either manually like:
wlans_rt28600="wlan0"
ifconfig_wlan0="WPA DHCP"
network={
ssid="freebsdap" (ssid)
psk="freebsdmall" (password)
}
#/etc/rc.d/netif start # restart the network interface
SUCCEED!!
reference:
"FreeBSD wireless handbook" -
http://www.freebsd.org/doc/en_US.ISO8859-1/books/handbook/network-wireless.html
file path summary:
/boot/loader.conf -> setting which module to boot when starting the system.
/boot/defaults/loader.conf -> default modules to boot.
/boot/modules -> put the custom kernel modules .ko to here
/boot/kernels -> put your .ko .ko.symbols to here
The eeebox's wireless chip is rt2860 made by the company - ralink.
method 1(WARNING: this method is NOT success in my trial):
convert windows driver for rt2860 to FreeBSD kernel module.
download windows version driver: rt2860.inf, rt2860.sys
put kernel module generated from ndisgen which is rt2860_sys.ko to /boot/modules
edit /boot/loader.conf add rt2860_sys_load="YES"
result -> fail -> the strange error message keep output to screen
"ndis0 if_input should not be called"
accidently find there are already a driver for rt2860 for FreeBSD 7.0 and 8.0 release
so I abandon method 1 and turn to method 2.
method 2 (SUCCESS): find the kernel module.
Surprisely, someone has write the rt2860/rt2870 driver for FreeBSD.
http://repo.or.cz/w/ralink_drivers/rt2860_fbsd8.git
use git clone links to download whole source code
make
cp rt2860.ko/ rt2860.ko.module to /boot/kernel
set rt2860_load="YES" in /boot/loader.conf
reboot system.
Loading rt2860.ko/rt2870.ko will create the hardware interface rt28600/rt28700 respectively but since version 8 of FreeBSD, these are not controlled directly for the usual settings but with a virtual interface that must created either manually like:
wlans_rt28600="wlan0"
ifconfig_wlan0="WPA DHCP"
network={
ssid="freebsdap" (ssid)
psk="freebsdmall" (password)
}
#/etc/rc.d/netif start # restart the network interface
SUCCEED!!
reference:
"FreeBSD wireless handbook" -
http://www.freebsd.org/doc/en_US.ISO8859-1/books/handbook/network-wireless.html
file path summary:
/boot/loader.conf -> setting which module to boot when starting the system.
/boot/defaults/loader.conf -> default modules to boot.
/boot/modules -> put the custom kernel modules .ko to here
/boot/kernels -> put your .ko .ko.symbols to here
4/22/2010
如何刪除幾天以前的舊檔案
指令如下
find /path/to/files* -mtime +5 -exec rm {} \;
o. /path/to/files* 是你所要刪除檔案的所在資料夾
o. -mitme 後面接的是檔案距離上次修改的時間. 如果打+5代表刪除所有五天以前的檔案
o. 最後的rm就是刪除. 如果要刪除的檔案是資料夾請加 -r.
o. 注意rm, {} , \ 之間有空格.
3/12/2010
make your own ls color
o. add this three line to your ~/.bashrc
alias ls='ls --color'
LS_COLORS='di=1:fi=0:ln=31:pi=5:so=5:bd=5:cd=5:or=31:mi=0:ex=35:*.rpm=90'
export LS_COLORS
o. parameter meaning:
di = directory
fi = file
ln = symbolic link
pi = fifo file
so = socket file
bd = block (buffered) special file
cd = character (unbuffered) special file
or = symbolic link pointing to a non-existent file (orphan)
mi = non-existent file pointed to by a symbolic link (visible when you type ls -l)
ex = file which is executable (ie. has 'x' set in permissions).
o. color number:
0 = default color
1 = bold
4 = underlined
5 = flashing text
7 = reverse field
31 = red
32 = green
33 = orange
34 = blue
35 = purple
36 = cyan
37 = grey
40 = black background
41 = red background
42 = green background
43 = orange background
44 = blue background
45 = purple background
46 = cyan background
47 = grey background
90 = dark grey
91 = light red
92 = light green
93 = yellow
94 = light blue
95 = light purple
96 = turquoise
100 = dark grey background
101 = light red background
102 = light green background
103 = yellow background
104 = light blue background
105 = light purple background
106 = turquoise background
3/04/2010
scientific method [FYI]
In the scientific method, you go through the following steps:
- You make observations.
- You develop hypotheses to explain these observations.
- You suggest experimental ways to test these hypotheses.
- You predict the results of the experiments.
- You run the experiments.
- You compare the results of your experiments to your predictions.
- You publish all your results.
訂閱:
文章 (Atom)